Last updated April 16, 2025
This new guide shows you the exact steps of how to start your blog in 2022.
In the last 11 years or so, I’ve started several blogs. My most successful blog made $259,463 in revenue in 2020. It’s a blog about training and preparing for a puppy where I sell my 4 self-published books.
I’ve also started news-related blogs, personal blogs and created a few websites for clients.
In this blog post, I explain the 13 steps I take when I start a new blog/website.
Ready to launch your new blog? Let’s go!
Start your new blog in 13 steps:
#1 Choose your blog name
#2 Buy your domain name
#3 Install WordPress on your website
#4 Change Temporary URL with WordPress
#5 Change Blog’s homepage to static page
#6 Make your Blog’s URLs SEO friendly
#7 Install Yoast SEO plugin & change these settings
#8 Install this WordPress theme to your blog
#9 Start creating these pages for your blog
#10 Start creating blog posts
#11 Add your photo to your blog
#12 Add a logo to your blog
#13 Add beautiful images to your blog
#1 Choose your blog name
By blog name, I mean domain name. For instance, for this blog, the domain name is Creatoregg.com.
The question is:
Should you use your own name or pick a brand name?
An example of a domain name where the blog owner uses her own name is the author Elizabeth Gilbert. Her blog’s domain name is https://www.elizabethgilbert.com/.
An example of a brand name is this blog. I didn’t choose my own name. Instead, I went with the name http://creatoregg.com/.
It depends on many factors whether you lean towards choosing your own name or a brand name.
Reasons why you might prefer a brand name:
- You prefer to stay anonymous.
- Your name is hard to spell.
- You don’t want you as a person to be the center of it all.
- You’re planning to build a business and may want to sell it in the future. Selling a personal domain name might be more challenging than a random brand name.
My two cents for making a decision:
- My personal preference is to go with a short, memorable name. Preferably a maximum of 10 characters.
- Always buy the .com extension if you start an English blog.
- When picking a brand name, don’t make the mistake of going too deep in one specific niche. An example is naming your travel blog SamInIndia.com when planning to travel to India for the upcoming year. Maybe two years later, you’re planning to blog about traveling to/in Japan, and your blog’s domain name limits you to do so. It’s not that you can’t blog about your backpacking adventures in Japan, but you get the point. A more appropriate name would be SamOnTheRoad.com, for instance.
- Don’t use dashes in your domain name. Imagine calling a potential partner, and you introduce yourself by saying: hello, this is Joe from joe-on-the-road.com. It’s unprofessional and error-sensitive, in my opinion.
- Lastly, don’t overthink it. A domain name isn’t that big of a critical piece of you finding success with your blog. In other words, stop spending your precious time thinking about a cool name. Pick one and go with it.
#2 Buy your domain name and web hosting
Bluehost is the cheapest web hosting I could find, and basically, every blogger recommends choosing Bluehost.
You receive a free 1-year domain when purchasing your web hosting through Bluehost.com. Bluehost is where I buy my domain names and host my websites.
Prices may vary from time to time, but the moment I purchased my domain name and web hosting for this website, www.creatoregg.com, I paid around $170 for my domain name and web hosting for 36 months. $170 is the total price for 36 months.
That’s about $4.70 per month in total.
I will now walk you through the steps of buying your domain name and web hosting over at Bluehost.
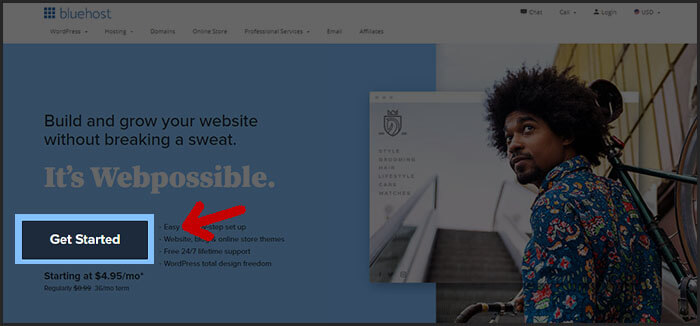
1 – Visit Bluehost.com
2 – Click the get started button
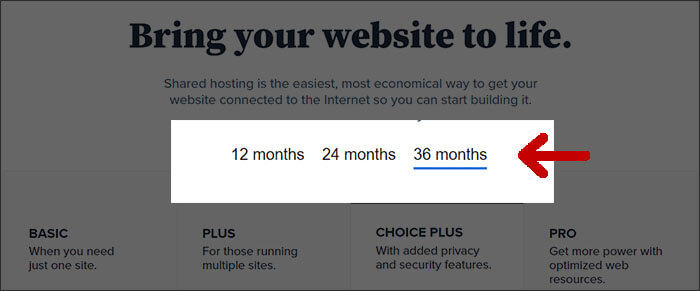
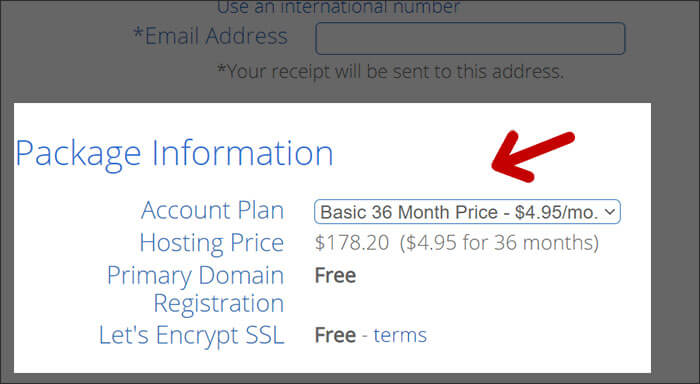
3 – Decide whether you go for 12 months, 24, or 36 months.
I chose 36 months for my blogs since it will be cheaper in the long run.
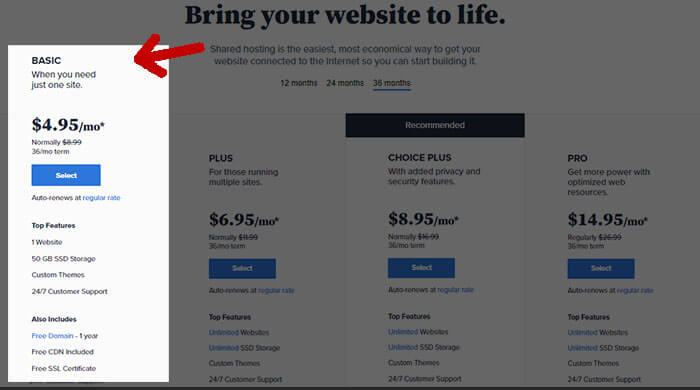
4 – Choose your web hosting plan.
For my blogs, I chose the cheapest option, the basic plan. The basic plan is excellent if you’re planning to create 1 blog.
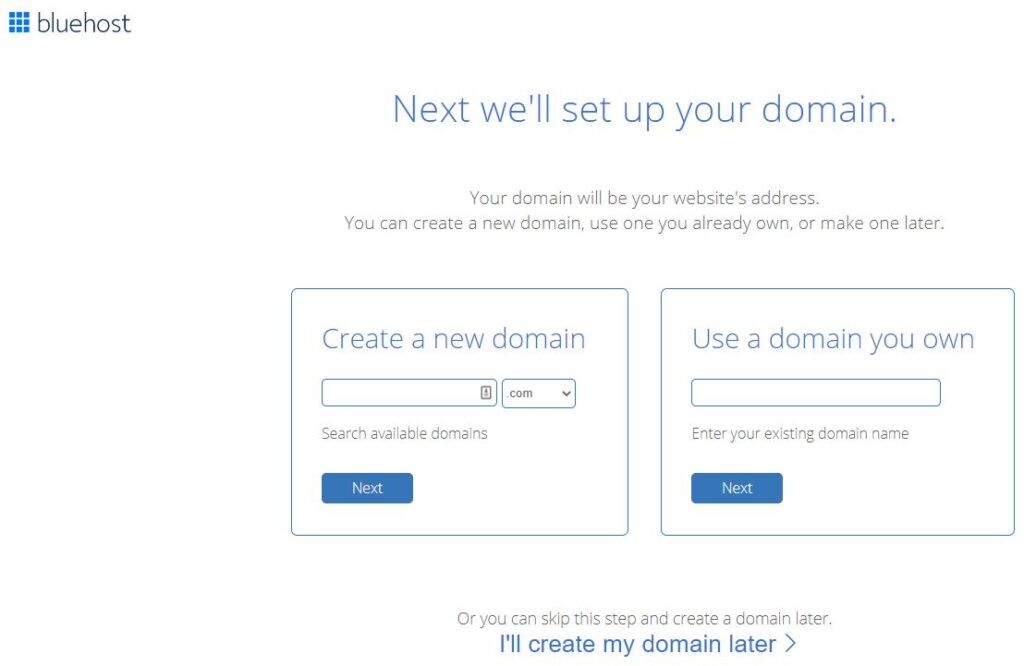
5 – Registring your new domain.
In the left column, you enter your new domain name.
If you already own the domain name, you can enter it in the right column.
6 – Fill in your contact details.
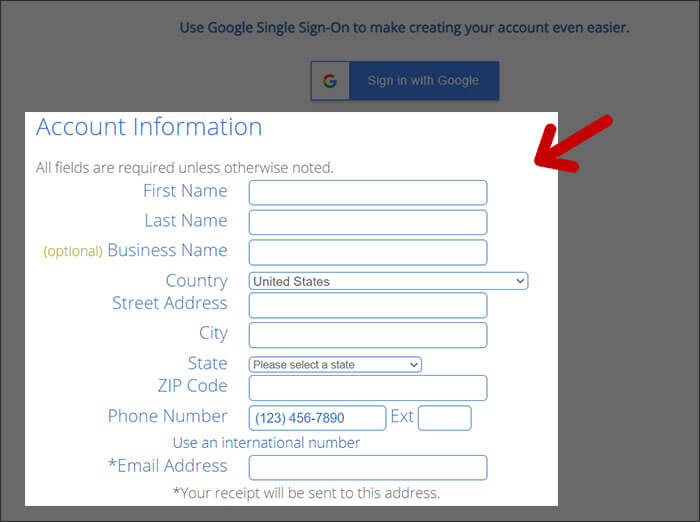
7 – Do an extra check you’re still on the plan you selected before.
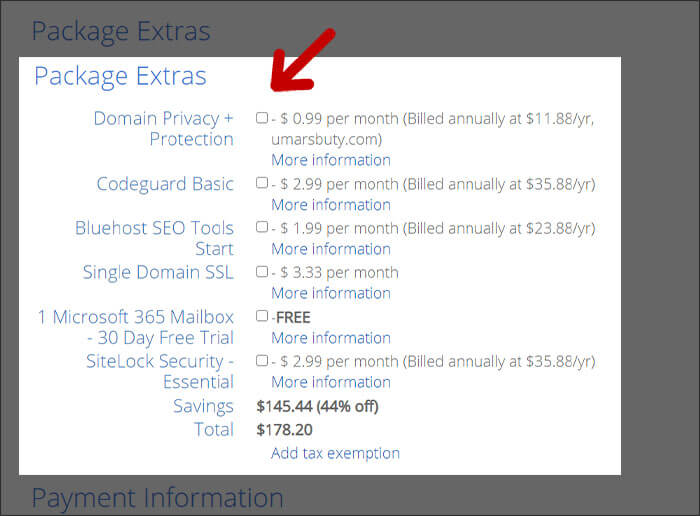
8 – Uncheck all the package extras.
It can be a personal preference, but in my opinion, you don’t need the package extras. It’ll cost you more money, and it’s not necessary.
9-Enter your credit card information.
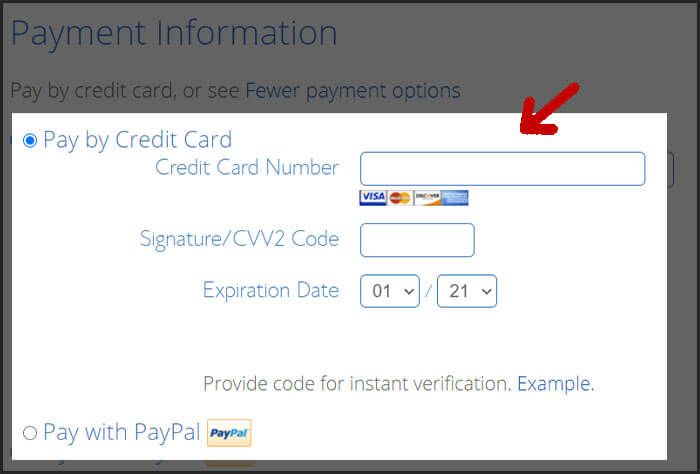
10 – Create your account
That’s it. You’re now ready to start with your new blog.
#3 Install WordPress on your website
For your new blog, you will want to use the content management system (CMS) called WordPress.
Why do I use WordPress?
Well:
- 59% of all the CMS websites in the world are running on WordPress. That must account for something. I don’t see WordPress going anywhere soon, and that is what you’re looking for starting a new blog. You don’t want to spend all of your precious time, money, and energy on a new blog just to find out a few years later the system your blog runs on stops.
- WordPress is free.
- Lots of third-party businesses created beautiful and intuitive design templates for it. There are 6,000+ templates available for you. These templates you can easily install and have a beautiful-looking blog in no-time for a fraction of the normal cost if you were to hire a designer and programmer to create a custom design for you.
- The plugin store of WordPress contains more than 50,000+ plugins. You can compare these plugins with apps in the app store. For instance, plugins can prevent spam, create contact forms, change your blog to a Google-friendly blog, and create a high-speed loading blog, etcetera.
To install WordPress on your blog, follow the following steps:
1 – Log into your Bluehost account
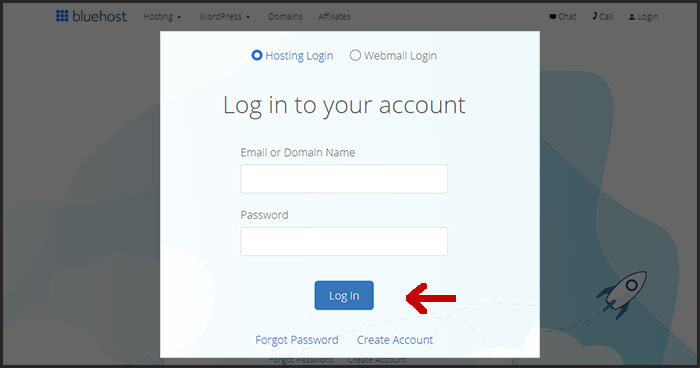
When logging in, you will get asked some questions. You can skip these questions.
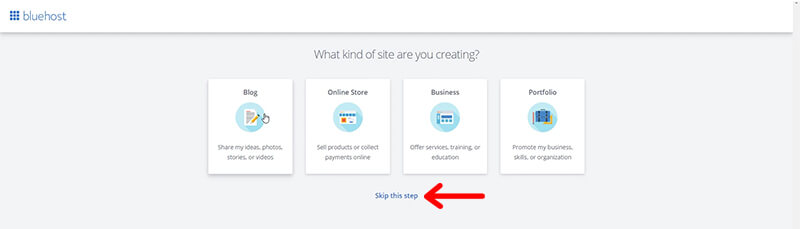
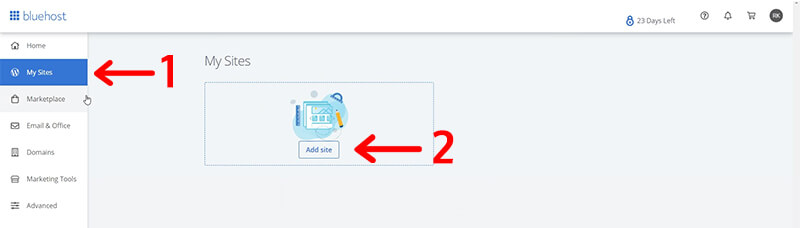
2 – Click on My Sites when you’re in the Bluehost dashboard.
3 – Click on Add Site.
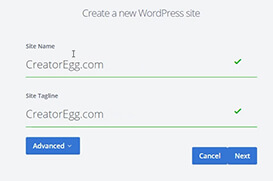
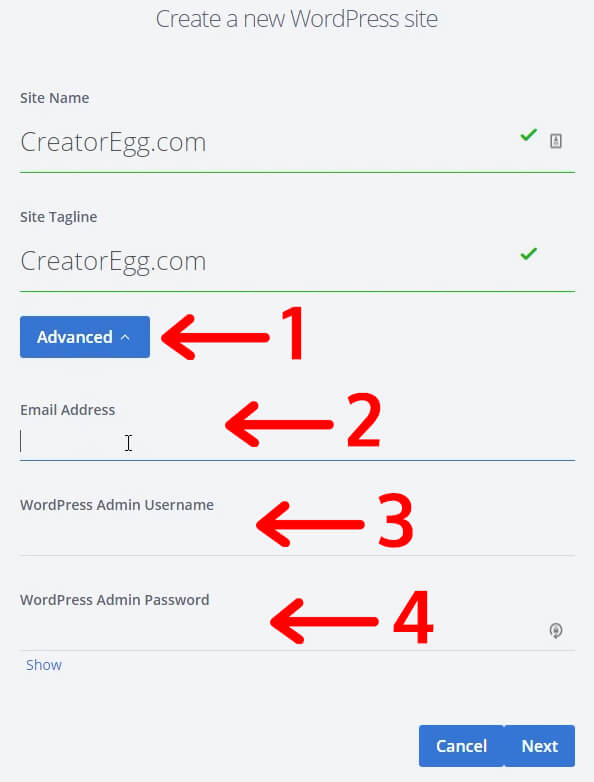
4 – Enter your Site Name and Site Tagline.
You can always change this information later on.
5 – Enter your email address and password you want to use for logging in to your WordPress blog in the future.
Make sure to save your login details for later purposes.
I use LastPass to save all my login usernames and passwords. You can use LastPass for free.
6 – Click on next.
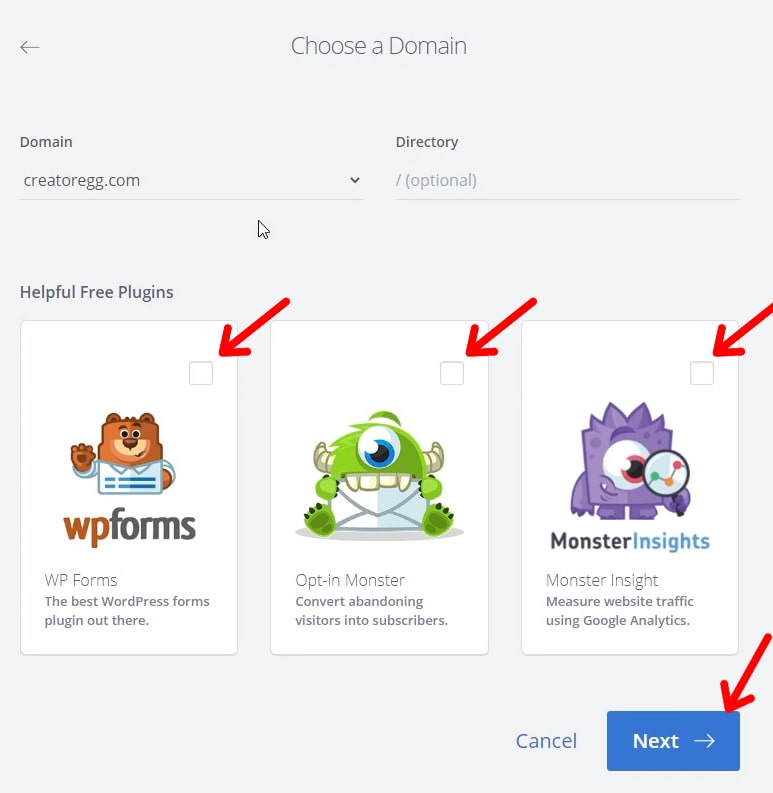
7 – Deselect the plugins they recommend. You can always install them later.
If I’m correct, you now should see a message:
WordPress installed successfully.
You just created and launched your blog. Congratulations.
#4 Change Temporary URL with WordPress
You don’t want to the strange Bluehost URL.
To change the temporary Bluehost URL to your actual domain URL, follow the following steps:
1-Click on is log in to WordPress.
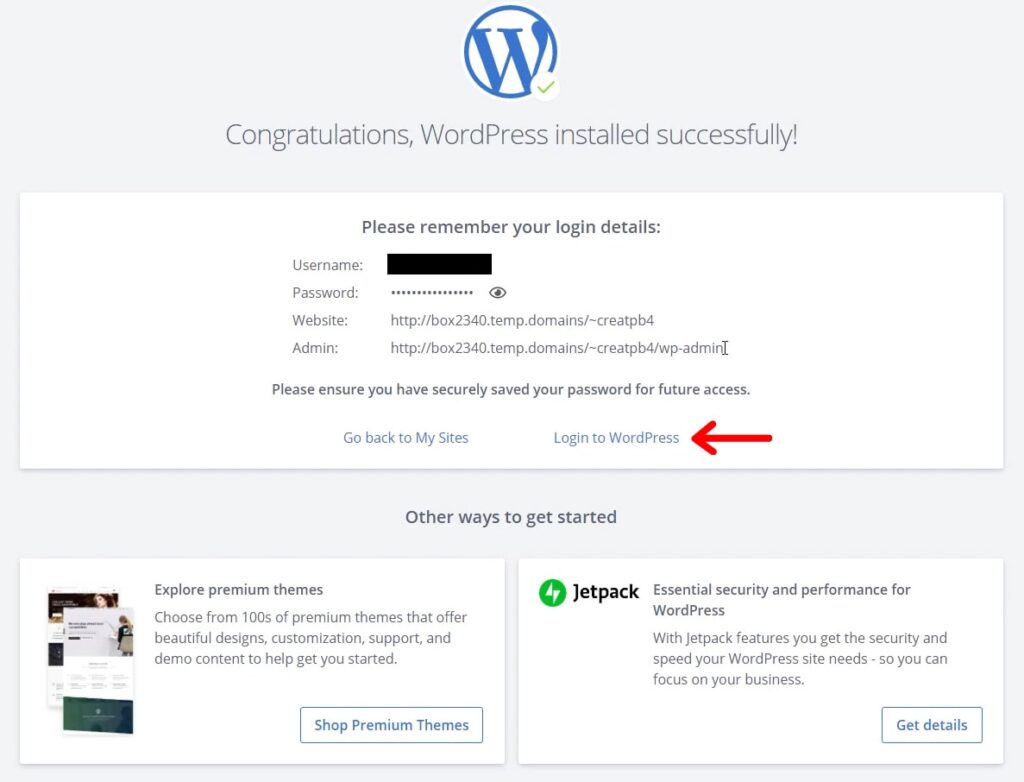
Or go to yourdomain.com/wp-admin if you want to find the screen below.
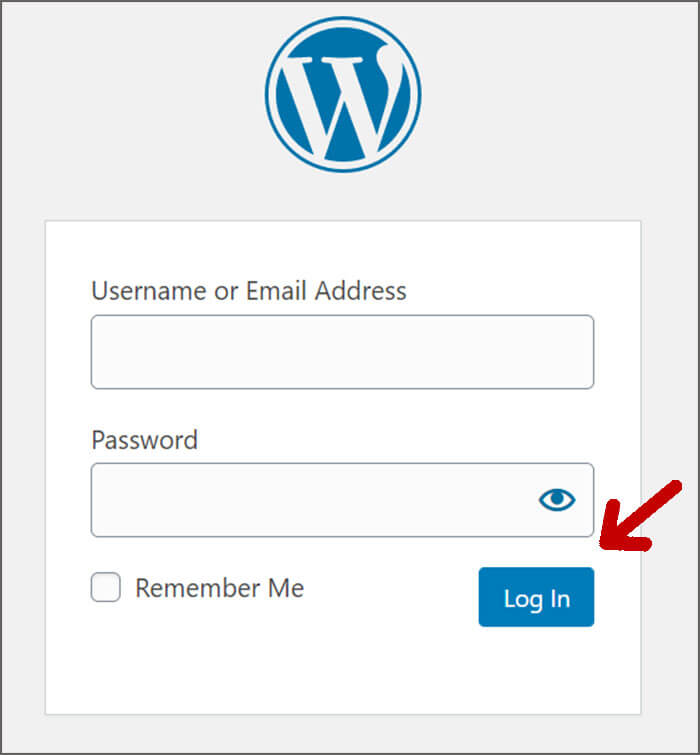
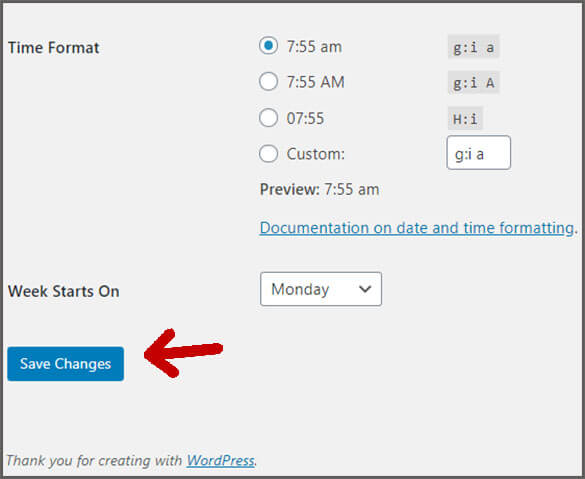
2 – Go to Settings and click on General.

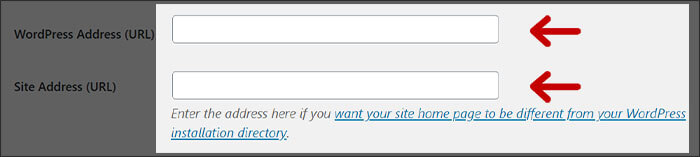
3 – Change the WordPress Address (URL) and Site Address (URL) to your domain name.
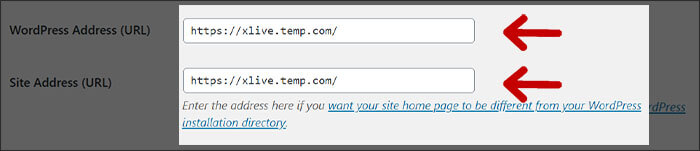
For my blog, it looked like this:
I changed it to this:
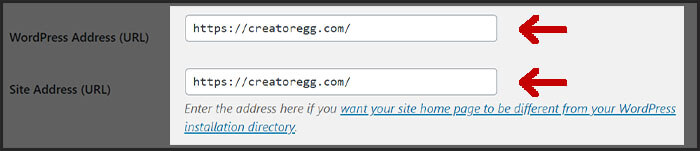
4 – Click on Save Changes.
If I’m correct, you now should see your actual domain name instead of the temporary Bluehost domain name.
#5 Change blog’s homepage to a static page
Within WordPress, you have 2 options to display on your homepage:
1 – Your latest posts
2 – A static page
In the earlier blogging days, mostly everyone showed their latest blog posts on their homepage, whereas the most recent ones automatically were pushed to the top.
Nowadays, the static page is way more popular.
I compare it with the IKEA store.
When entering an IKEA store, you see those arrows on the floor, right?
They guide you from one place in the store to the next, the next, and so on, until you finally reach the checkout point to pay for the goods you added to your basket.
IKEA strategically added those arrows on the floor because they believe it will generate more revenue instead of just letting people randomly walk through their store.
When they let people randomly walk through their store, there’s a chance some parts of the store won’t get noticed, and therefore some products won’t get bought.
Same thing for your blog.
If you let your blog visitors randomly visit your blog’s pages without giving any direction, there’s a good chance your best blog posts or your paid products stay unnoticed.
That’s a shame.
I suggest you add a clear statement at the top of your blog:
Hello, I’m [your name].
I help [blank] with [blank].
To change your blog’s homepage to a static page instead of showing your latest blog posts follow the following steps:
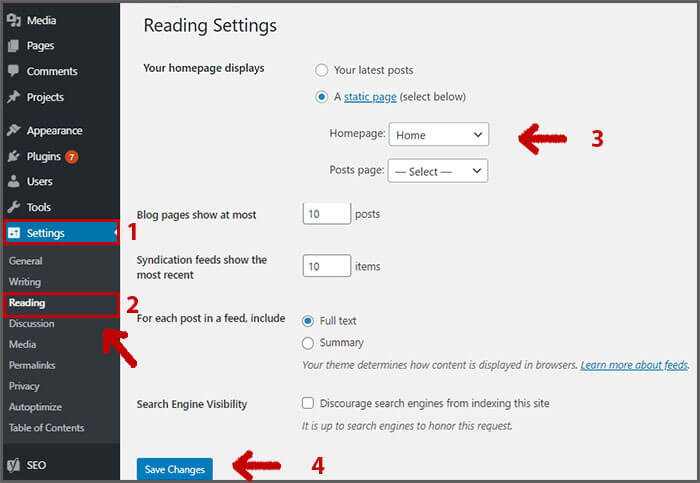
1 – Click to Settings in your WordPress dashboard.
2 – Click on Reading.
3 – Select A Static Homepage.
4 – Click on Save Changes.
To change the content of your new home page, follow to following steps:
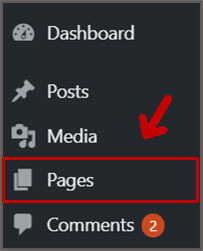
1 – Click on Pages in your WordPress dashboard.
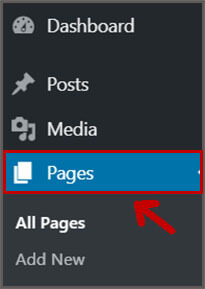
2 – Click on the page that has the line Front Page next to it.
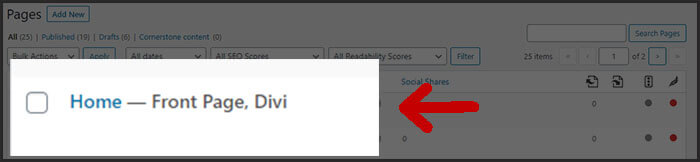
3 – Change the page to your liking, click Update.
#6 Make your Blog’s URLs SEO friendly
For the ones that are not familiar with the term SEO, it stands for:
Search Engine Optimization.
In plain English:
We’ll do our best to optimize our blog to rank higher in Google and, therefore, more people find our blog.
One of the SEO best practices is to use SEO-friendly URLs for your blog.
The standard WordPress blog’s settings are that your URLs look like this:
www.creatoregg.com/?p=123.
What does ?p=123 mean?
No one knows.
Therefore, you want your blog’s posts to look something like this:
www.creatoregg.com/start-blog
Again, in plain English.
You want the words (we marketers call keywords) you want to rank for in Google in your URL.
To make your blog’s URLs SEO friendly, you follow the following steps:
1 – Go to Settings in your WordPress dashboard.
2 – Click on Permalinks
3 – Change it from Plain to Custom Structure.
4 – In the field of Custom Structure, it should say /%postname%.
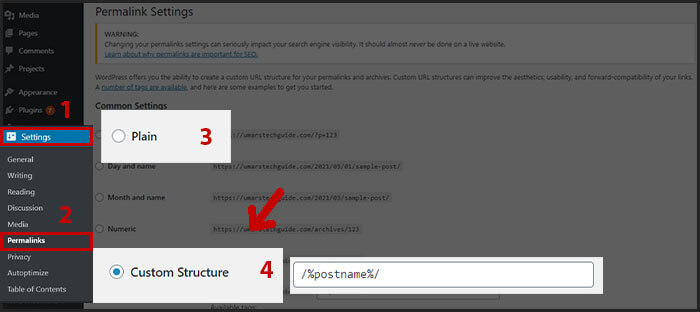
To delete the last slash do this:
So not:
/%postname%/.
Instead:
/%postname%.
#7 Install Yoast SEO plugin & change these settings
As told earlier, you can find 50,000+ WordPress plugins in the WordPress ‘app store.’
Same as with your smartphone, some plugins/apps are more useful than others. It also depends on what your goal is with your blog.
For me, the essential plugin to have is a plugin that helps with ranking your blog higher in Google.
The plugin I use for all my blogs to rank my blogs higher in Google is Yoast SEO.
There are 2 ways to install a new plugin.
The first option to install Yoast SEO:
1 – Go to Plugins in your WordPress dashboard.
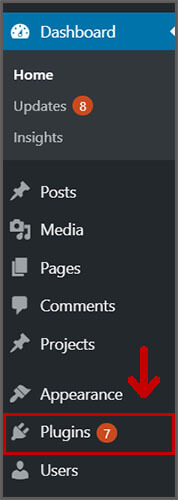
2 – Click on Add New.
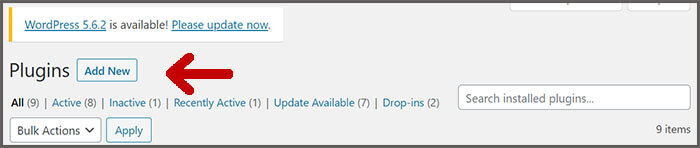
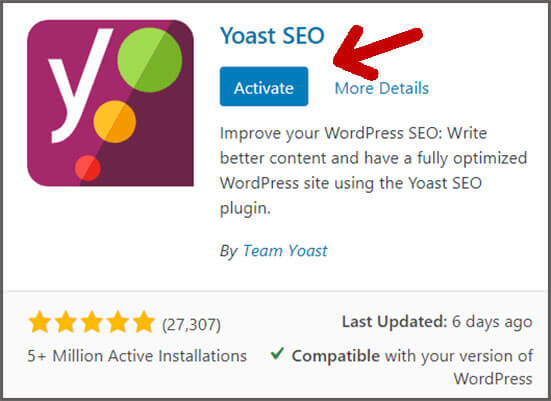
3 – In the search bar, you type Yoast SEO.

4 – Click Install Now.

5 – Click Activate.
Then there’s another way to install a plugin:
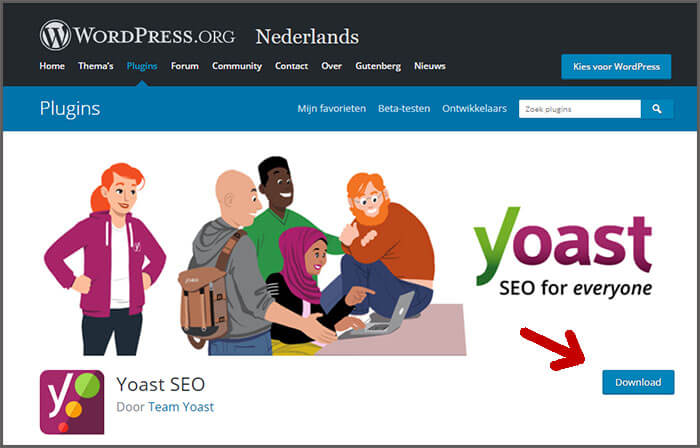
1 – Visit the Yoast SEO plugin’s page on WordPress.org.
2 – Click Download.
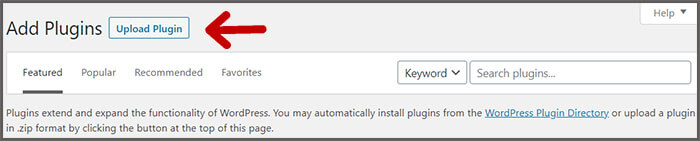
3 – Go to Plugins in your WordPress dashboard.
4 – Click on Add New.
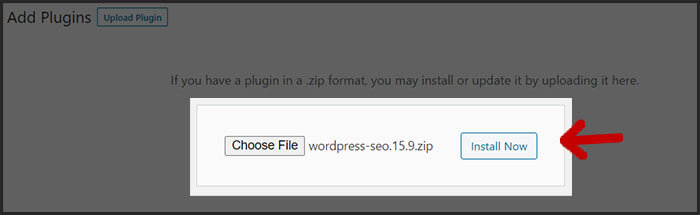
5 – Click on Upload Plugin.
6 – Upload the file you just downloaded.
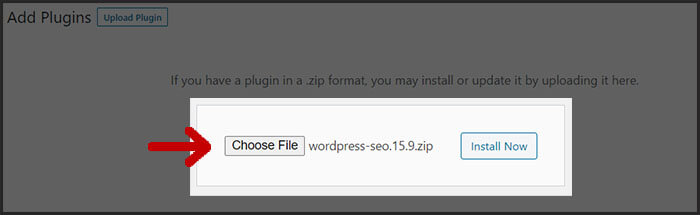
7- Click on Install Now.
I always make some changes to the settings of the Yoast SEO plugin for my blogs.
With the Yoast SEO plugin you can de-index certain pages from your blog.
What does de-index mean?
De-indexing a particular page means that you tell Google that you don’t want Google to add that page to their Google database.
By doing so, that page won’t get found in Google.
Why the * will you tell Google not to index certain pages of your blog?
Is it not that the more pages you have, the higher the chance people visit your blog?
No.
You ONLY want Google to index high-quality pages of your blog.
If you have many low-quality pages on your blog, it will tear down your blog’s overall Google rating.
With my blogs, I always de-index:
- Category pages
- Tag pages
- Portfolio tags
- Portfolio categories
- Author archive pages
- Date archive pages
Follow the following steps to de-index the above pages:
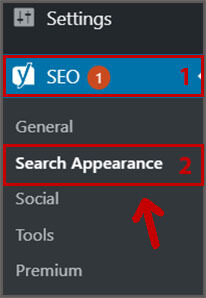
1 – Go to SEO and click on Search Appearance in your WordPress dashboard.
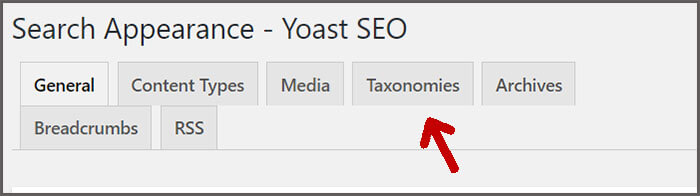
2 – Click on Taxonomies.
3 – Switch Show categories in search results to No.

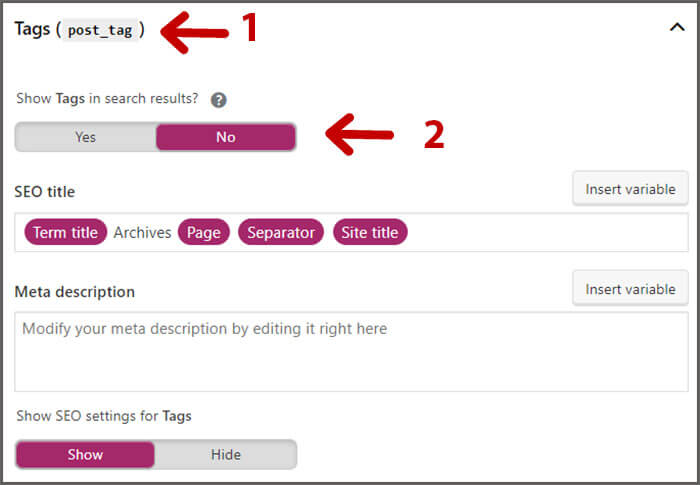
4 – Click on Tags.
5 – Switch Show Tags in search results to No.
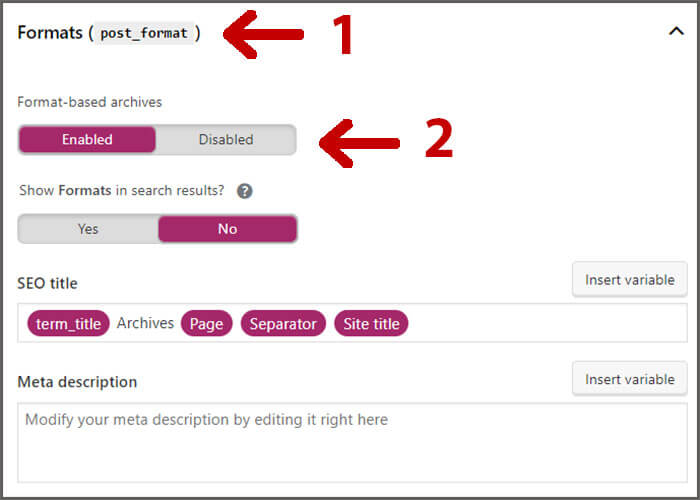
6 – Click on Formats.
7 – Switch Format-based archives to Disabled.
8 – Click on Portfolio Tags.
9 – Switch Show Portfolio Tags in search results to No.
10 – Click on Portfolio Categories.
11 – Switch Show Portfolio Categories in search results to No.
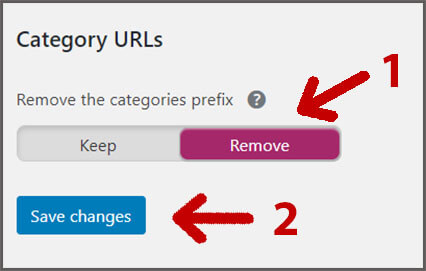
12 – Lastly, you want to remove the category prefix from your URLs. You do this by switching to Remove at Remove the category prefix.
13 – Click on Save Changes.
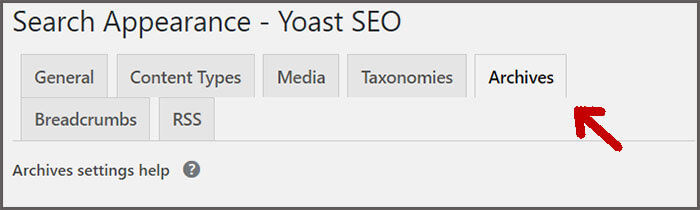
Then you move on to Archives:
1 – Click on Archives.
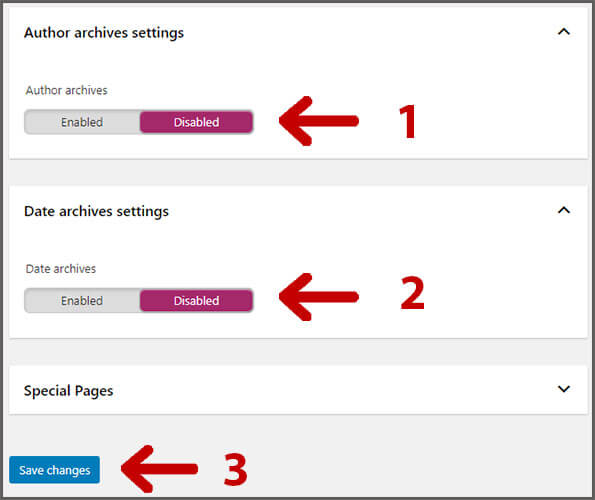
2 – Click on Author Archives settings.
3 – Switch Author archives to Disabled.
4 – Click on Date Archives settings.
5 – Switch Date archives to Disabled.
6 – Click on Save Changes.
When you changed all these settings, your so-called XML Sitemap should look like this:
You can check your blog’s sitemap if you go to the following URL:
www.creatoregg.com/sitemap_index.xml.
Use your domain name instead of mine, of course.
A sitemap tells Google better find the important pages on your blog.
#8 – Install this WordPress Theme to your Blog
By installing a professional WordPress theme, you give your blog a nice look and feel.
Most professional themes have an easy dashboard where you can change colors, buttons, headers, and so forth.
Nowadays, you don’t have to be a professional designer nor programmer to create beautiful and professional-looking blogs.
You can do all of that in your theme’s user-friendly dashboard.
The question is:
What theme should you pick?
There are more than 6,000 available themes. Some of them are free and some paid.
During the past 11 years, I’ve come across many different WordPress themes.
The one I like most and still use is called the Pro Theme from Themeco.
It’s super user-friendly, has an incredible community behind it, lots of documentation to help you get started, and has unlimited customization features.
The Pro Theme from Themeco costs $97. It’s a one-time payment.
If you want to install a theme, you can do so by following the steps below:
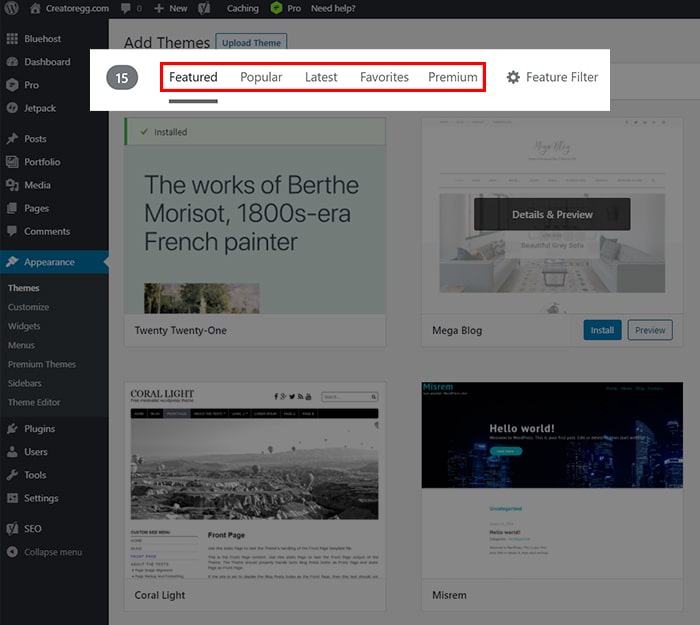
1 – Click on Appearance in your WordPress dashboard.
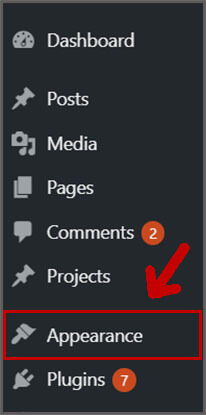
2 – Click on Themes
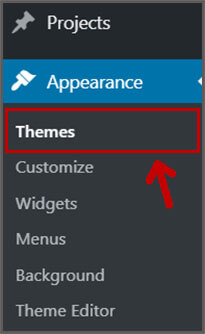
3 – Click on Add New Theme.

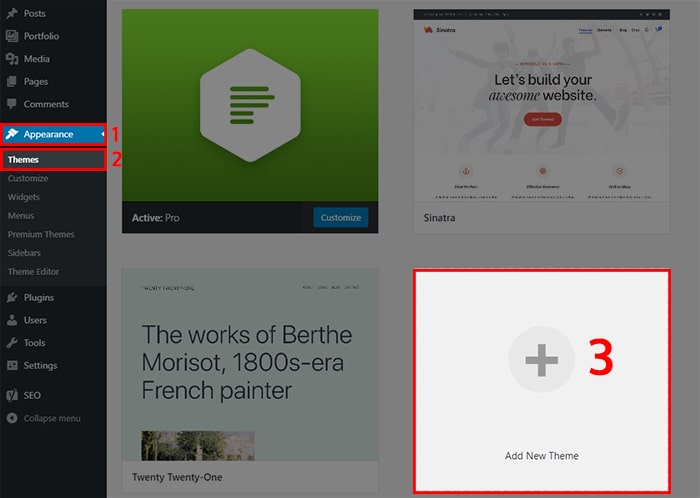
When you haven’t made any changes, you’ll have the standard WordPress theme installed, the Twenty Twenty-One theme.
You can browse all the other themes there too.
You can click on the theme to preview the template.
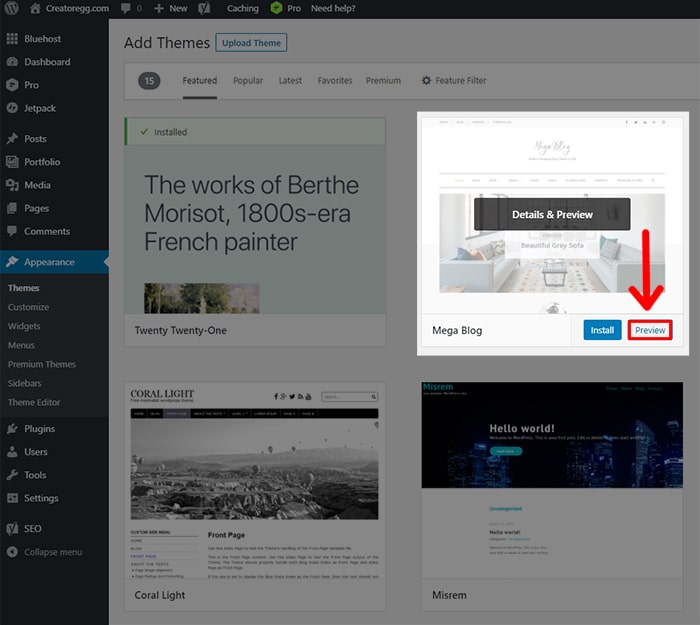
You’re now at the Featured templates tab, but you can also click on Popular, Latest, and Premium to see other templates.
So again, for this website, Creatoregg.com, and my other websites for my 4 self-published books, www.puppygroep.nl and www.puppybee.com, I use the premium WordPress template Pro Theme from Themeco.
#9 Start creating pages for your blog
Start by creating the following pages:
- Privacy policy
- Terms of service
- Contact page
You can create these pages by following the steps below:
1 – Go to Pages in your WordPress dashboard.
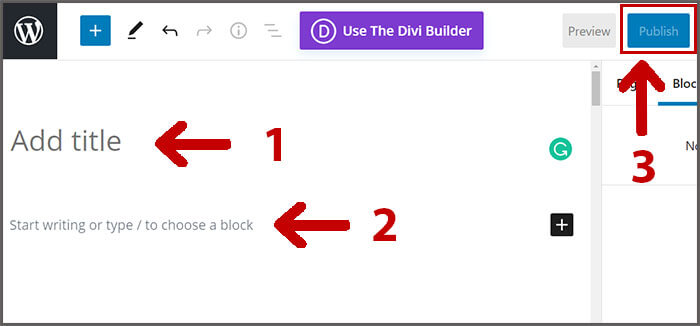
2 – Click on Add New.

3 – Give the page the title Privacy Policy.
4 – Start writing content for that page.
5 – Click Publish.
6 – Rinse and repeat for the Terms of service page and Contact page.
7 – Add these pages to the footer of your website.
How you can add these pages to the footer of your website depends on what theme you have. Every theme has a different process.
If you have the same theme as I have, The Pro Theme from Themeco, then you can follow the following steps to create the same footer as I have for my blog:
1 – Download the template here for free I use for my footer on this blog.
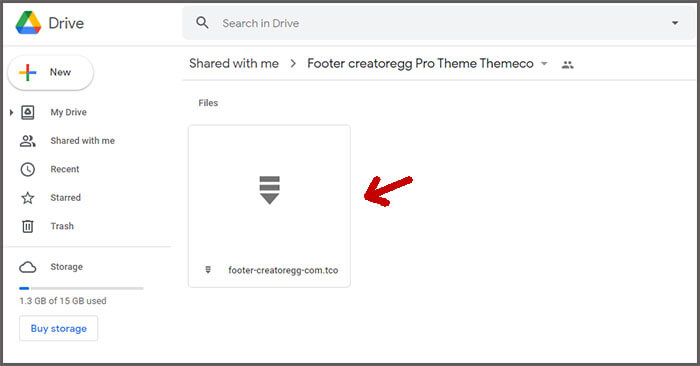
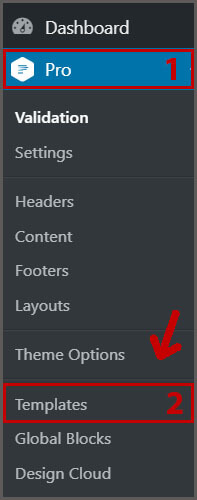
2 – Hover with your mouse on Pro in your WordPress dashboard.
2 – Click on Templates.
4 – Drag the template you just downloaded in there.
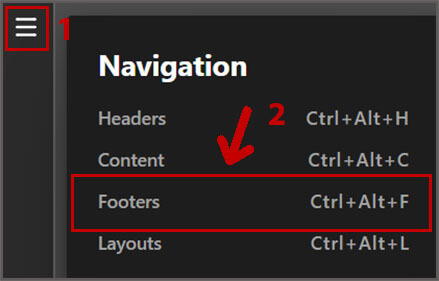
5 – Click in the top left corner menu and select Footers.
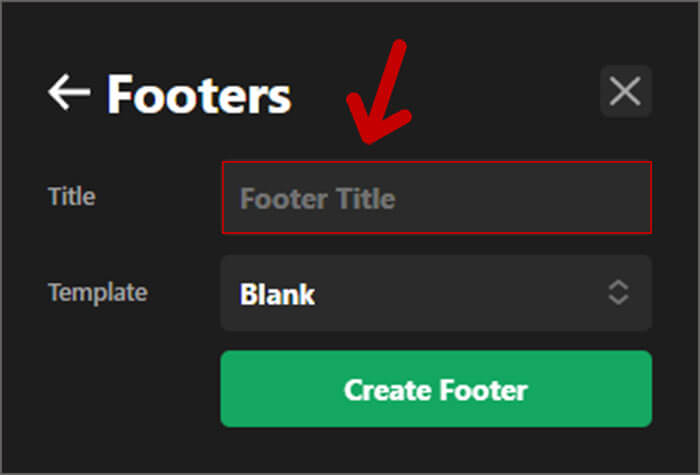
6 – Click the + icon.
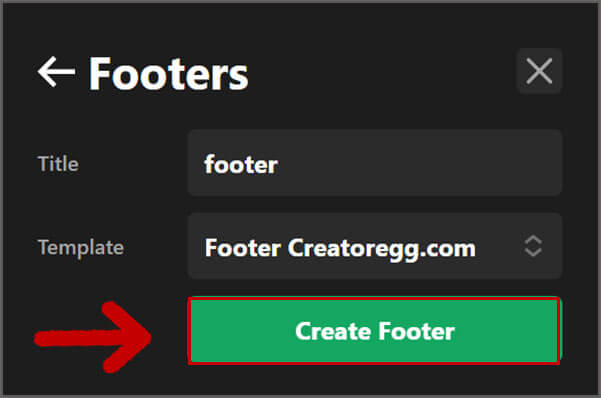
7 – Give your new Footer a title.
8 – Select the template you just downloaded.
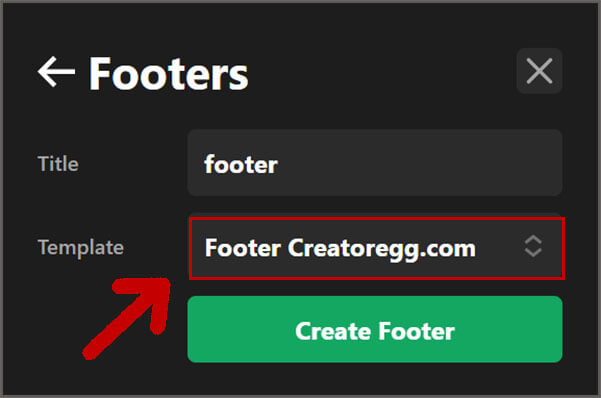
9 – Click on the green button that says Create Footer.
10 – Click on the cogwheel icon.
11 – Click on Conditions to assign your footer to your entire website or other pages/posts.
12 – Done.
#10 Start creating blog posts
My first blog post for this website, Creatoregg.com, was this post. A step-by-step guide on how to create an author website.
That post contained more than 5,000 words and 30+ images. It cost me lots of hours to write and assemble all of it.
That blog post’s idea is to rank high in Google on the keyword create an author website.
Since I’m an author myself and have lots of experience creating my author websites, I’m sharing the exact process I follow to make my author websites.
It’s similar to this blog post where I’m sharing my process of starting a blog. This blog post’s idea is to rank high in Google on the keyword how to start a blog.
My process of writing new blog posts is as follows:
1 – Doing keyword research with the Google Keyword Planner.

2 – Pick 1 main keyword for your blog post.
For this blog post, the main keyword is how to start a blog.
3 – Find synonyms and related keywords for your main keyword.
Related terms for this blog post are:
- How to create a blog.
- How to become a blogger.
- How to set up a blog.
- And dozens of others …
4 – Write your blog post.
I write my blog posts in Grammarly.
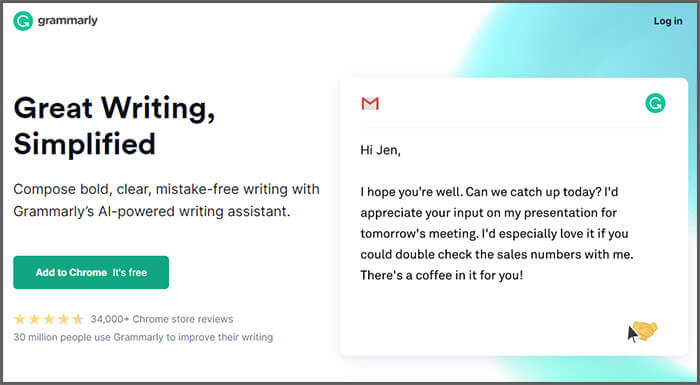
Grammarly is a software tool that helps me to prevent making grammar mistakes. You might still find some errors but believe me; you don’t want to see my writing without Grammarly. Definitely worth the money.
5 – Find relevant images for your blog post
I add all the images you see in this blog post near the end.
I’m not continually going back and forth finding images while writing the post.
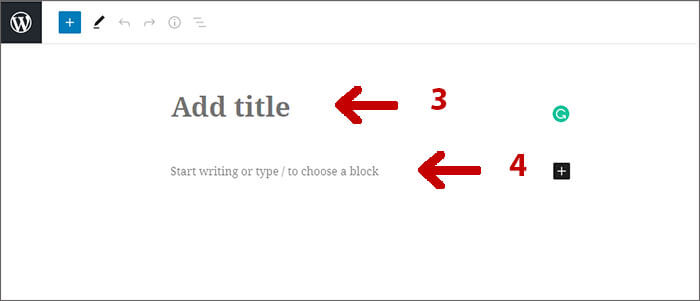
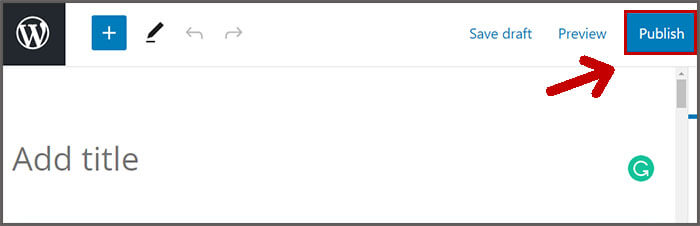
6 – Create a blog post inside your WordPress dashboard and add all the content to it
- Go to Posts in your WordPress dashboard.
- Click on Add New.

- Give your post a title.
- Add the content you created to the blog post.
- Enter a solid SEO title in the Yoast SEO section.
- Add a solid meta description in the Yoast SEO section.
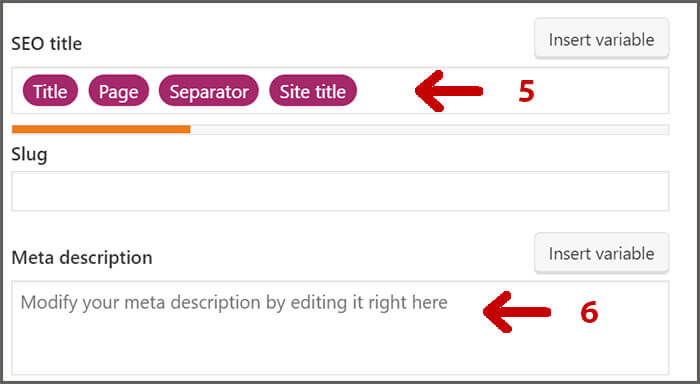
- Click on Publish.
#11 Add your photo to your blog
Especially for bloggers, I think it’s important to get some personal connection with your audience.
I add that personal touch by adding a photo of myself to the homepage and the blog’s footer.
Adding your picture creates trust, and trust generates more sales.
My two cents for creating a professional-looking photo for the do it yourself people (like me):
- Sit in front of a solid-colored wall. In my case, I sat in front of a white wall, as you can see in the image in my footer.
- Use lights so there’s no shadow on your torso nor face.
- Take a picture from your torso up to your face. You don’t need a full-body photo since the most important part is your face.
- Don’t cross your arms since people associate it with being defensive.
- Remove the background of the photo you took and upload a .png file to your blog. I outsourced this job to a freelancer I found on Fiverr.com. I think it will cost you only $5 to $15 or something.
It depends on what WordPress theme you choose what steps you need to follow to add that photo to your blog’s homepage and footer. I’m using Theme Pro from Themeco.
#12 Add a logo to your blog
A logo doesn’t have to cost hundreds or thousands of dollars.
The logo I use for my puppy training blog I bought for $39 on Themeforest.net.
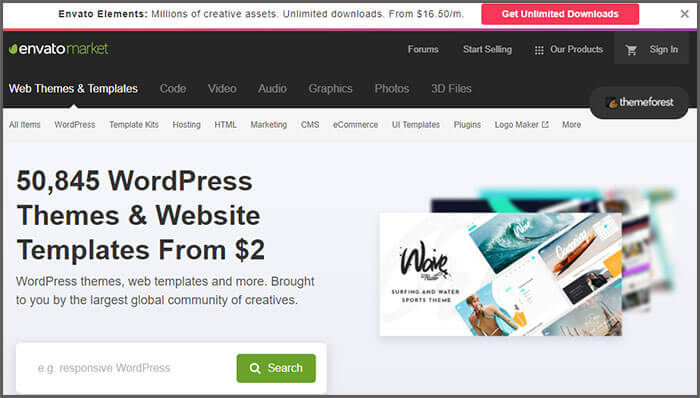
If you can’t find a nice-looking logo on Themeforest and/or are looking for a unique logo for your blog, you can give 99designs.com a try.
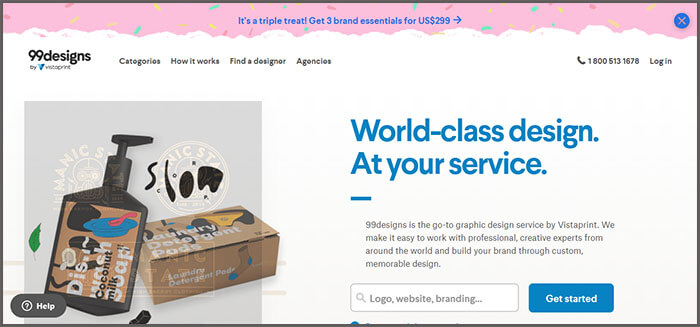
On 99designs, you can create a job description, and designers from all over the world will compete for you as a client. You only pay if satisfied. I hired a designer once to design a flyer for me to print.
#13 Add beautiful images to your blog
If you don’t know so already, you cannot download random pictures from the internet and add those to your blog.
By doing so, there’s a chance you will receive a copyright claim of hundreds or thousands of dollars.
If you can’t use images from the internet, where do you get them?
There are plenty of free websites where you can find free images you can use.
Here are 3 websites I sometimes use:
2 – https://www.freeimages.com/
Another option is to use stock photos from a company like Shutterstock.com.

Most of the images in my 4 self-published books and on my puppy training blog are from Shutterstock.
I believe Shutterstock offers the best price and lots of choices for you to find the perfect photos.
A while ago, I bought their most expensive subscription of around $240 (€199) for 750 images per month.
You can easily download all of those 750 images in the first month and then cancel your subscription. That’s what I did.
By doing so, I only paid around $0.33 per image.
Conclusion
I started my puppy training blog in 2011.
My initial idea was to earn some money with ads and learn a thing or two about blogging and making blogs.
Since 2015 I started to invest most of my time into my puppy training blog that led to me self-publishing 4 books that are now available as an ebook, audiobook, paperback, and two languages.
In 2018 my creator-income (the income I generated from my blog and products) surpassed my living expenses for the first time.
In 2020 I made $259,463 in revenue from my puppy training blog.
Nowadays, I only spent around 5 hours per week on it and can pursue other things I enjoy doing.
For me, starting a blog offered me so much freedom in time and money that I wouldn’t have had if I didn’t start the blog.
I would like to hear from you:
Why do you want to start a blog? Or maybe you have a question for me.
Let me know by leaving me a comment below.
If you’re finding this content valuable, share it with a friend, and consider subscribing if you haven’t already for updates on great content.
Sincerely,
Robbin 👋